Being newly diagnosed with coeliac disease can feel overwhelming.
One day you’re eating normally, and suddenly you’re being told you need to follow a strict gluten-free diet for life.
Then the questions start.
What can I eat?
Do I need a new toaster?
Can I still eat at restaurants?
What does “may contain” mean?
Do I need to throw away everything in my pantry?
Can my family still eat gluten?
What happens if I accidentally eat some?
And perhaps the biggest question:
Where do I even start?
The good news is that you don’t need to learn everything about coeliac disease in your first week.
There are a handful of important things to deal with first. Once those are under control, you can gradually learn the rest.
This coeliac disease newly diagnosed checklist will take you through the process step by step.
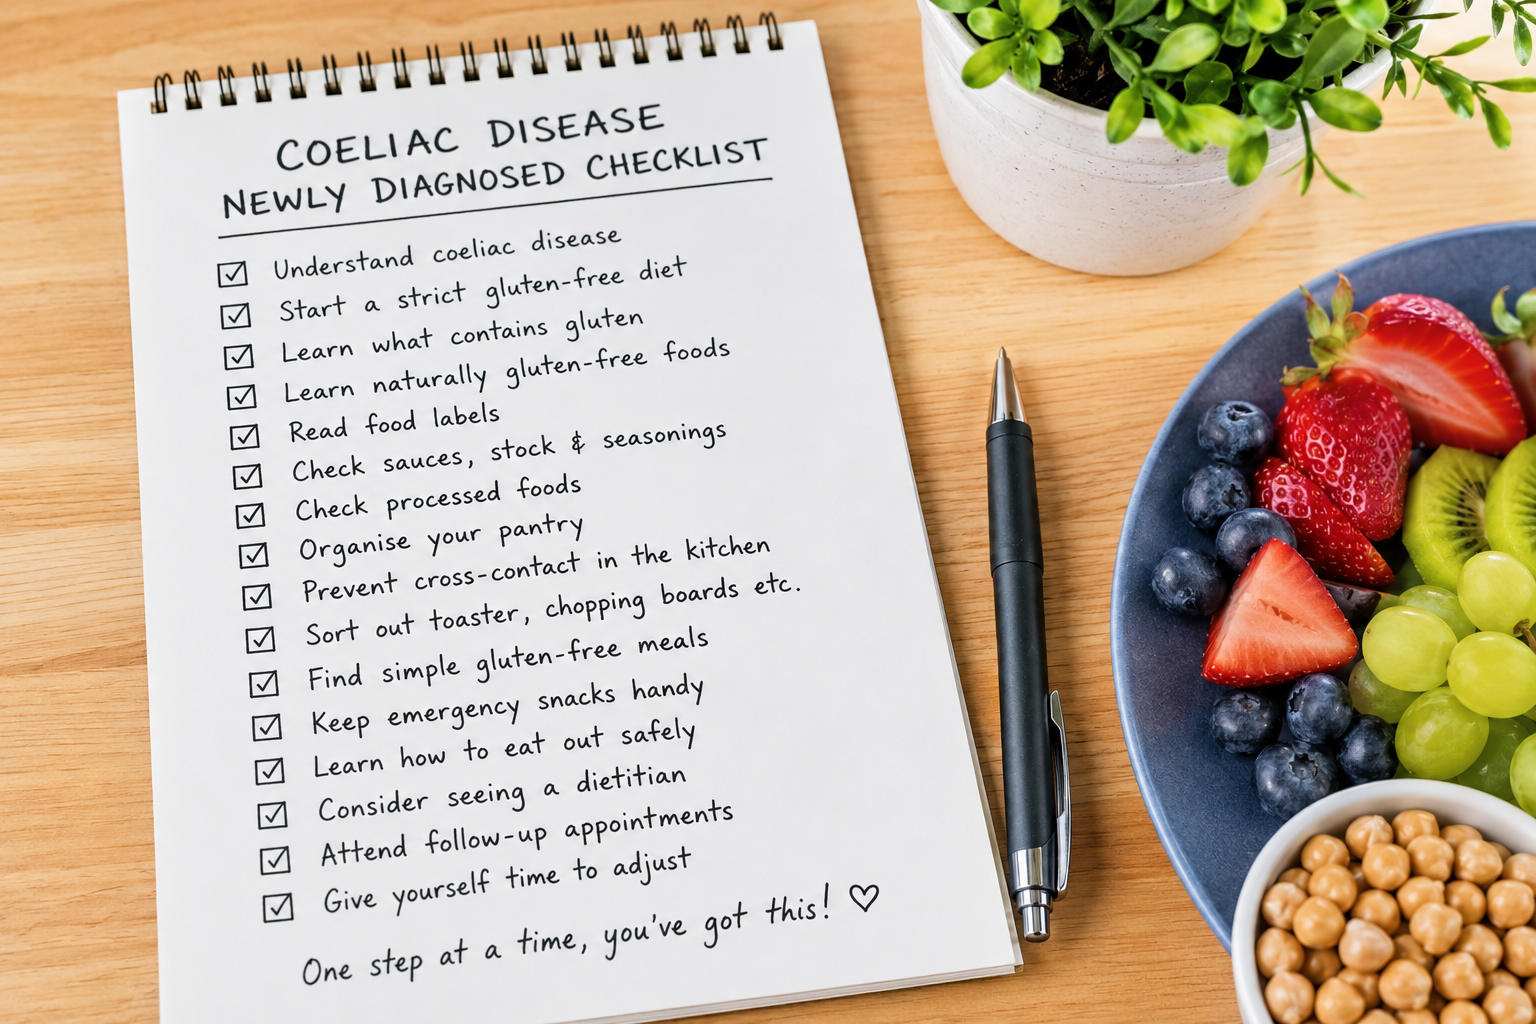
Newly Diagnosed Coeliac Disease Checklist
If you don’t have time to read the entire guide right now, start here.
After your diagnosis:
☐ Understand what coeliac disease is.
☐ Start a strict gluten-free diet once your diagnosis has been medically confirmed and your healthcare team has told you to do so.
☐ Learn the main gluten-containing grains.
☐ Learn which foods are naturally gluten free.
☐ Check your pantry and fridge.
☐ Learn how to read food labels.
☐ Reduce gluten cross-contact in your kitchen.
☐ Replace or separate a few high-risk kitchen items.
☐ Find several simple gluten-free meals you enjoy.
☐ Keep safe gluten-free snacks available.
☐ Learn what questions to ask when eating out.
☐ Consider seeing a dietitian experienced with coeliac disease.
☐ Follow the ongoing medical care recommended by your healthcare team.
You don’t need to master all of these today.
Let’s work through them one at a time.
Step 1: Make Sure Your Diagnosis Is Complete
Before we get into changing your kitchen, there’s an important distinction to make.
If you’ve only been told that you might have coeliac disease and your testing hasn’t been completed, don’t start a gluten-free diet without discussing it with your doctor.
Coeliac testing is generally performed while you’re still eating gluten.
Removing gluten before testing is complete can affect antibody blood tests and intestinal biopsy results and potentially make diagnosis more difficult.
If you’ve already stopped eating gluten before completing testing, talk to your doctor rather than attempting a gluten challenge yourself.
Coeliac New Zealand – Tests & Diagnosis
If your diagnosis has been confirmed and your healthcare team has told you to begin a gluten-free diet, then it’s time to start making changes.
Step 2: Understand What Coeliac Disease Actually Is
Coeliac disease isn’t simply a food intolerance or a preference for eating gluten free.
It is an autoimmune condition.
For someone with coeliac disease, eating gluten triggers an immune response that damages the lining of the small intestine.
This is why treatment involves following a strict gluten-free diet.
Coeliac New Zealand states that people with coeliac disease need to follow a strict gluten-free diet for life.
That can sound intimidating when you’ve just been diagnosed.
But “gluten free for life” doesn’t mean:
“I can never enjoy food again.”
It means learning which foods contain gluten and replacing those foods with safe alternatives.
Step 3: Learn These Three Words First
You don’t need to memorise a dictionary of ingredients on your first shopping trip.
Start with:
WHEAT
BARLEY
RYE
These are the main gluten-containing grains you’ll need to recognise.
Wheat includes varieties and ingredients such as:
- Spelt
- Durum
- Semolina
- Bulgur
- Couscous
- Einkorn
- Emmer
- Khorasan wheat/Kamut
Barley is also important because it can appear as malt.
That includes ingredients such as:
- Barley malt
- Malt extract
- Malt syrup
As you become more confident reading labels, recognising these names becomes much easier.
Step 4: If You’re in New Zealand, Learn About Oats Too
This is one area where international gluten-free advice can become confusing.
You might see overseas websites describing specially produced “gluten-free oats.”
However, New Zealand and Australia have different gluten-free food standards from some other countries.
Coeliac New Zealand advises people with coeliac disease to avoid oats, including products marketed overseas as gluten-free oats, unless oats have been medically assessed as appropriate in their individual circumstances.
So if you’re in New Zealand, don’t simply follow an American gluten-free food list that includes oats.
Follow the guidance applicable here.
Coeliac New Zealand – How to Eat Gluten Free
Step 5: Don’t Start by Looking at Everything You Can’t Eat
One of the biggest mistakes after diagnosis is opening the pantry and thinking:
I can’t eat anything anymore.
You can.
A lot of ordinary foods are naturally gluten free.
Examples include:
Fruit
- Apples
- Bananas
- Oranges
- Kiwifruit
- Berries
- Grapes
- Pears
- Peaches
- Melons
Vegetables
- Potatoes
- Kumara/sweet potato
- Carrots
- Pumpkin
- Broccoli
- Cauliflower
- Tomatoes
- Capsicum
- Lettuce
- Spinach
Protein
Plain:
- Beef
- Chicken
- Lamb
- Pork
- Fish
- Seafood
- Eggs
Other Staples
- Rice
- Corn
- Beans
- Lentils
- Chickpeas
- Nuts
- Seeds
Many plain dairy foods are also naturally gluten free.
Coeliac New Zealand includes fresh fruit, vegetables, rice, potato, corn, plain meat, fish, eggs, cheese, milk, most yoghurts and pulses among naturally gluten-free foods.
This is a much better starting point.
Instead of building your first shopping list around expensive specialty products, build meals around naturally gluten-free foods.
Step 6: Create 5 Easy Meals You Know You Can Eat
Don’t try to become a gluten-free gourmet chef during your first week.
Find five simple meals.
For example:
Meal 1
Grilled chicken + roast potatoes + vegetables.
Meal 2
Beef stir-fry + vegetables + rice + suitable gluten-free sauce.
Meal 3
Baked fish + mashed potato + salad.
Meal 4
Gluten-free pasta + homemade or suitable packaged tomato sauce + cheese.
Meal 5
Baked potato + cheese + suitable toppings + salad.
Suddenly dinner doesn’t seem quite so complicated.
Once you have five safe meals, start expanding from there.
Step 7: Go Through Your Pantry — But Don’t Panic
You don’t necessarily need to throw your entire pantry into the rubbish.
Work through it section by section.
Create three categories:
1. Naturally Gluten Free
For example:
- Rice
- Plain canned tomatoes
- Plain beans
- Plain nuts
- Suitable herbs and spices
2. Definitely Contains Gluten
Examples might include:
- Regular wheat pasta
- Regular bread
- Wheat flour
- Regular biscuits
- Regular crackers
These can be removed from your gluten-free area or kept separately for family members who still eat gluten.
3. Need to Check
This will probably be your biggest pile.
It might include:
- Sauces
- Stock
- Gravy
- Seasoning
- Soup
- Chips
- Chocolate
- Processed meat
- Breakfast cereal
Read each label before deciding.
Step 8: You Don’t Necessarily Need a Completely Gluten-Free Household
If other members of your household don’t have coeliac disease, they don’t necessarily need to stop eating gluten.
A shared kitchen can work.
However, you need systems that prevent gluten crumbs and ingredients from contaminating gluten-free food.
For example, you might have:
Regular bread
and
Gluten-free bread
in the same house.
But putting both into the same crumb-filled toaster is something you’ll need to address.
The same applies to shared spreads, chopping boards and certain pieces of cooking equipment.
We’ll cover those shortly.
Step 9: Learn to Read Food Labels
This is one of the most important skills you’ll develop after diagnosis.
At first, supermarket shopping might take twice as long because you’re reading everything.
That’s normal.
You’ll gradually learn which products you regularly buy and which ingredients need more investigation.
In New Zealand and Australia, foods making a gluten-free claim must comply with the Australia New Zealand Food Standards Code. Coeliac New Zealand explains that products manufactured in New Zealand and Australia labelled gluten free must contain no detectable gluten, and gluten-free claims also have requirements relating to oats and malted gluten-containing cereals.
You’ll also see some products carrying the Crossed Grain Logo.
Coeliac New Zealand’s Crossed Grain certification provides independent assurance that certified products meet the programme’s requirements for people following a gluten-free diet.
Step 10: Don’t Assume “Wheat Free” Means “Gluten Free”
This is an important beginner mistake to avoid.
Wheat free and gluten free don’t mean the same thing.
A product might contain no wheat but still contain:
- Barley
- Rye
So don’t buy something simply because the packaging says:
WHEAT FREE
Look for appropriate gluten-free information and read the ingredients.
Step 11: Check Your Sauces
If you only inspect your bread and pasta, you’re going to miss a major part of the kitchen.
Check your:
- Soy sauce
- BBQ sauce
- Worcestershire sauce
- Tomato sauce
- Stir-fry sauces
- Teriyaki sauce
- Salad dressings
- Marinades
- Gravy
- Stock
Some will already be suitable.
Others won’t.
Traditional soy sauce is one particularly common product to check because it often contains wheat.
You can replace unsuitable products gradually rather than buying an entirely new pantry in one day.
Step 12: Check Processed Meat
Plain fresh meat is naturally gluten free.
Processed meat is different.
Check products such as:
- Sausages
- Burger patties
- Meatballs
- Deli meat
- Marinated chicken
- Crumbed meat
These may contain fillers, breadcrumbs, sauces, marinades or seasonings.
Don’t assume that something is gluten free simply because most of the product is meat.
Step 13: Create a Safe Gluten-Free Area
If you share your kitchen with people who eat gluten, giving gluten-free food its own area can make life easier.
You might dedicate:
- One pantry shelf
- One cupboard
- One bread container
- One freezer drawer
to gluten-free products.
This doesn’t magically prevent all cross-contact, but it helps stop regular bread crumbs and flour from getting into your food.
Store gluten-free foods above loose gluten-containing products such as wheat flour when practical.
That way, spilled flour or crumbs are less likely to fall onto gluten-free packaging or food.
Step 14: Deal With the Toaster
The toaster is one of the easiest kitchen problems to solve.
Regular bread leaves crumbs inside it.
Putting gluten-free bread into the same toaster can transfer those crumbs.
Many households choose to have a separate gluten-free toaster.
Make it obvious which toaster is which.
A sticker saying:
GLUTEN FREE
can prevent someone accidentally putting regular bread into it.
Step 15: Stop Double-Dipping Into Spreads
This is another incredibly common source of crumbs.
Someone makes regular toast.
They put the knife into the butter.
Spread the butter.
Then put the knife back into the container.
Now there are bread crumbs in the butter.
The same problem can happen with:
- Jam
- Peanut butter
- Marmalade
- Cream cheese
- Chocolate spread
A simple solution is having separate containers marked GLUTEN FREE.
Alternatively, some households use squeeze bottles or other systems that prevent crumb-contaminated utensils going back into shared food.
Step 16: Don’t Spend Hundreds of Dollars Replacing Your Kitchen
After diagnosis, you may see enormous lists online telling you to replace practically everything you own.
Don’t panic-buy an entirely new kitchen.
Many items can be thoroughly cleaned and continue to be used.
The things that deserve more attention are equipment that is difficult to clean thoroughly or regularly traps crumbs and gluten-containing residue.
We’ll go through this properly in Part 2.
Step 17: Consider Seeing a Dietitian
A gluten-free diet involves more than replacing bread with gluten-free bread.
Your overall diet still needs to provide adequate:
- Fibre
- Iron
- Calcium
- Vitamins
- Minerals
- Protein
- Energy
Coeliac disease can also be associated with nutritional deficiencies, particularly around the time of diagnosis.
A dietitian experienced in coeliac disease can help you understand your diet, food labels, nutrition and any individual issues that apply to you.
Coeliac New Zealand has resources developed for health professionals supporting people newly diagnosed with coeliac disease.
Step 18: Don’t Assume You’ll Feel Better Immediately
Some people notice improvements fairly quickly after starting a gluten-free diet.
For others, recovery takes considerably longer.
Coeliac New Zealand notes that symptoms should gradually improve after starting a gluten-free diet, while healing of the gut can take much longer.
Your recovery won’t necessarily look exactly like someone else’s.
If symptoms continue, worsen, or you’re concerned about your recovery, talk to your healthcare provider rather than simply removing more and more foods yourself.
Step 19: Find Reliable Information
Once you’re diagnosed, you’ll probably start Googling everything you eat.
Be careful.
Social media groups and online forums can be useful for recipes and personal experiences, but they’re not always reliable sources of medical or food-safety advice.
For New Zealand readers, a good starting point is:
You can also use:
Healthify – Coeliac Disease Overview
These resources can help you check information rather than relying on random social-media comments.
Your Goal for the First Week
You don’t need to know everything.
For your first week, concentrate on:
1. Understanding what contains gluten.
2. Finding safe foods you enjoy.
3. Learning basic label reading.
4. Making your kitchen safer.
5. Finding several easy meals.
6. Getting appropriate medical and dietary support.
Everything else can come gradually.
Coming Up in Part 2
In Part 2 of our Coeliac Disease Newly Diagnosed Checklist, we’ll tackle the practical home changes that cause the most confusion:
- What kitchen equipment should you replace?
- What can simply be cleaned?
- Do you need separate pots and pans?
- Do you need separate chopping boards?
- What about wooden spoons?
- Can your family continue eating gluten?
- How should you store gluten-free food?
- What happens with air fryers?
- What about shared ovens?
- How do you make school or work lunches safer?
- What should you keep in your handbag or car?
- What should you do before your first restaurant meal?
Coeliac Disease Newly Diagnosed Checklist: Part 2
Once you’ve learned the basics of gluten and started checking your pantry, the next step is making everyday life easier.
One of the biggest worries when you’re newly diagnosed with coeliac disease is cross-contact.
Do you need to replace your pots?
Can you use the same oven?
What about your air fryer?
Can your family keep eating regular bread?
And exactly how much of your kitchen needs to change?
The good news is that you generally don’t need to throw away everything you own.
The goal is to create practical systems that keep gluten-containing crumbs, flour and food away from your gluten-free meals.
Step 20: Understand Gluten Cross-Contact
Gluten cross-contact happens when a gluten-free food comes into contact with gluten.
For example, imagine you buy a loaf of gluten-free bread.
The bread itself is suitable.
But then you:
- Put it into a toaster filled with regular bread crumbs.
- Spread butter on it using butter containing regular bread crumbs.
- Prepare it on a chopping board covered in crumbs.
You started with gluten-free bread, but it has now been exposed to gluten.
That’s why managing coeliac disease isn’t only about buying gluten-free food.
You also need to think about preparation.
Coeliac New Zealand provides guidance on avoiding cross-contamination when preparing gluten-free food.
Step 21: Do You Need New Pots and Pans?
Usually, you don’t need to replace every pot and pan simply because you’ve been diagnosed with coeliac disease.
Equipment that can be thoroughly cleaned can generally continue to be used.
Before preparing gluten-free food:
- Remove visible food residue.
- Wash equipment thoroughly.
- Make sure cooking surfaces are clean.
- Use clean utensils.
However, damaged equipment with deep scratches or difficult-to-clean areas may deserve additional consideration.
The important question is:
Can this item be thoroughly cleaned?
Step 22: Do You Need a Separate Chopping Board?
Chopping boards deserve extra attention because they’re used constantly and can develop scratches where food residue becomes trapped.
A dedicated gluten-free chopping board is an inexpensive way to make food preparation easier in a shared household.
You could mark it:
GLUTEN FREE ONLY
or choose one that’s easy for everyone in the household to recognise.
That removes the need to wonder whether someone made a regular sandwich on it five minutes earlier.
Step 23: What About Wooden Spoons?
Wooden utensils can be harder to clean thoroughly than smooth, non-porous utensils, particularly when they’re old, cracked or heavily worn.
Rather than worrying every time you cook, you may prefer to keep dedicated gluten-free versions of difficult-to-clean utensils.
Silicone, metal and other easy-to-clean utensils can be convenient options.
You don’t need fifty new kitchen tools.
A few clearly identified gluten-free utensils can make cooking much less stressful.
Step 24: What About a Colander?
A colander is another item worth thinking about.
Regular pasta can leave residue around:
- Small holes
- Seams
- Edges
- Handles
Because a basic colander is relatively inexpensive, some households find it easier to keep one specifically for gluten-free pasta.
Label it so nobody accidentally drains wheat pasta through it.
Step 25: Can You Share Plates, Bowls and Cutlery?
Generally, ordinary plates, glasses, bowls and metal cutlery don’t need to be permanently separated if they can be thoroughly washed.
The important part is making sure they’re actually clean before they’re used for gluten-free food.
This is different from equipment such as a conventional toaster, where crumbs accumulate inside areas that aren’t easily cleaned between uses.
Step 26: Do You Need a Separate Toaster?
A separate toaster is one of the most useful changes in a shared kitchen.
Regular bread leaves crumbs throughout a toaster.
Instead of worrying about cleaning the inside every time, consider keeping a dedicated gluten-free toaster.
Make it obvious.
For example:
GF ONLY
A brightly coloured sticker can prevent another family member from accidentally putting wheat bread into it.
Step 27: What About Sandwich Presses?
Sandwich presses can collect crumbs and cooked-on food.
If your household frequently makes regular toasted sandwiches, you need to prevent gluten-free bread from coming into contact with that residue.
Depending on the appliance, you may use a dedicated gluten-free appliance or another method that completely separates your food from the contaminated cooking surface.
Whatever method you use, make sure the gluten-free food can’t come into direct contact with crumbs.
Step 28: Can You Share an Oven?
A household oven doesn’t necessarily have to become exclusively gluten free.
However, you should prevent gluten-containing crumbs, food and loose flour from coming into contact with gluten-free food.
Practical steps include:
- Use clean trays.
- Use clean baking dishes.
- Cover food where appropriate.
- Remove visible crumbs.
- Clean contaminated surfaces.
- Avoid preparing gluten-free food where loose wheat flour is being spread around.
Loose flour deserves particular attention because it can spread easily during baking.
Step 29: What About Fan-Forced Ovens?
If you’re baking with loose wheat flour, flour particles can spread around the kitchen and oven area.
Avoid simultaneously preparing uncovered gluten-free food while regular flour is being mixed, poured or dusted nearby.
If your household does a lot of baking with wheat flour, consider doing gluten-free preparation at a different time after surfaces and equipment have been cleaned.
Step 30: Can You Share an Air Fryer?
This depends heavily on the appliance and how it’s used.
An air fryer regularly used for:
- Crumbed chicken
- Breaded fish
- Regular chicken nuggets
- Other gluten-containing crumbed foods
can accumulate crumbs and residue inside the basket and appliance.
Because air fryers have baskets, fans, seams and other areas that can be difficult to clean completely, a dedicated gluten-free air fryer can be a practical option in households that regularly cook gluten-containing foods in theirs.
If you’re uncertain about a particular appliance, discuss your kitchen setup with your dietitian or coeliac organisation.
Step 31: What About the Microwave?
Microwaves can generally be shared when they’re kept clean and gluten-free food is protected from spills and food residue.
Wipe away:
- Crumbs
- Sauce splashes
- Food residue
before preparing your meal.
Using a clean plate and covering your food can also help keep it protected.
Step 32: The Flour Problem
If there’s one pantry ingredient worth being particularly careful with, it’s regular wheat flour.
Flour can:
- Spill onto shelves.
- Cover benches.
- Get onto utensils.
- Spread during baking.
- Contaminate open containers.
If your household continues using wheat flour, store it securely and away from gluten-free ingredients.
Keep gluten-free flour and baking supplies separately.
When possible, avoid preparing gluten-free food at the same time someone is baking with regular flour.
Step 33: Store Gluten-Free Food Above Gluten Food
Here’s a simple kitchen rule:
Gluten free goes above gluten.
Why?
Imagine you keep your gluten-free flour on the bottom shelf and regular wheat flour above it.
Someone pulls the wheat flour out and spills some.
It can fall onto your gluten-free products.
Keeping gluten-free food on higher shelves reduces the chance of crumbs or flour falling onto it.
Step 34: Create a Gluten-Free Pantry Shelf
You don’t necessarily need an entirely separate pantry.
One dedicated shelf or cupboard can work well.
Keep items such as:
- Gluten-free bread
- Pasta
- Flour
- Crackers
- Cereal
- Baking ingredients
- Snacks
together.
This also makes shopping easier because you can quickly see what you’re running low on.
Step 35: Label Everything
If several people live in your household, labels can save a lot of confusion.
Consider labels for:
- Toaster
- Butter
- Jam
- Peanut butter
- Chopping board
- Colander
- Baking ingredients
A simple:
GLUTEN FREE – PLEASE DON’T USE
can prevent plenty of accidental mistakes.
Step 36: Can Your Family Keep Eating Gluten?
Yes, many households successfully manage both gluten-containing and gluten-free diets.
You don’t necessarily need to force everyone else to become gluten free.
However, everyone needs to understand the basic rules.
For example:
Don’t put regular bread in the gluten-free toaster.
Don’t dip a crumb-covered knife into the gluten-free butter.
Don’t prepare wheat bread directly on the gluten-free chopping board.
Don’t use gluten-free utensils for gluten-containing food.
The system only works when everyone understands it.
Step 37: Consider Making Some Meals Gluten Free for Everyone
You don’t have to cook two completely different dinners every night.
Many family meals can easily be gluten free.
For example:
Roast Chicken
Chicken + potatoes + vegetables + suitable gluten-free gravy.
Tacos
Use suitable gluten-free taco shells or tortillas and check seasonings.
Stir-Fry
Use rice and suitable gluten-free sauces.
Spaghetti Bolognese
Make one pot of sauce and serve with gluten-free pasta.
Curry
Make the curry with suitable ingredients and serve with rice.
This can significantly reduce the amount of gluten moving around the kitchen.
Step 38: Make Your First Gluten-Free Shopping List
Your first gluten-free supermarket trip doesn’t need to cost hundreds of dollars.
Start with the basics.
Fruit
Choose your favourites, such as:
- Apples
- Bananas
- Oranges
- Kiwifruit
- Berries
Vegetables
For example:
- Potatoes
- Kumara
- Carrots
- Broccoli
- Pumpkin
- Tomatoes
- Lettuce
Protein
Plain:
- Chicken
- Beef
- Lamb
- Fish
- Eggs
Dairy
Suitable:
- Milk
- Cheese
- Butter
- Yoghurt
Pantry
- Rice
- Canned tomatoes
- Beans
- Chickpeas
- Lentils
- Nuts
- Seeds
Gluten-Free Replacements
Start with the products you actually use:
- Gluten-free bread
- Gluten-free pasta
- Gluten-free flour
- Gluten-free crackers
- Suitable cereal
Condiments
Check whether you need suitable replacements for:
- Soy sauce
- Stock
- Gravy
- BBQ sauce
- Tomato sauce
- Salad dressing
You don’t need to buy every gluten-free product in the supermarket.
Step 39: Don’t Assume Gluten-Free Products Are Healthier
A packet saying GLUTEN FREE doesn’t automatically make the food nutritious.
Gluten-free:
- Biscuits
- Cakes
- Chips
- Chocolate
- Snack foods
can still be high in sugar, salt, saturated fat or calories.
They’re absolutely foods you may enjoy as part of your diet, but don’t feel as though you need to replace every wheat-based processed food with an expensive gluten-free processed version.
Naturally gluten-free foods can form the foundation of your diet.
Step 40: Think About Fibre
Some people find their fibre intake changes after switching to gluten-free food.
Regular wholegrain bread and cereals may previously have provided a significant amount of fibre.
Depending on your individual dietary needs, naturally gluten-free fibre sources can include:
- Fruit
- Vegetables
- Legumes
- Nuts
- Seeds
- Suitable gluten-free whole grains
A dietitian can help you make sure your new diet remains nutritionally balanced.
Step 41: Prepare for Work
Your workplace introduces another environment you don’t completely control.
If you bring lunch from home, consider:
- Clearly labelled containers.
- Keeping gluten-free food protected.
- Cleaning shared surfaces.
- Using clean utensils.
If there’s a shared toaster full of regular bread crumbs, don’t put your gluten-free bread into it.
Step 42: Keep Emergency Snacks With You
One of the easiest ways to make your first few months less stressful is to keep something safe with you.
Depending on your preferences, that might be:
- Nuts
- Suitable snack bars
- Gluten-free crackers
- Packaged gluten-free snacks
- Dried fruit
This is particularly helpful when:
- Appointments run late.
- You’re travelling.
- A café has nothing suitable.
- A social event doesn’t have safe food.
Being hungry makes it much more tempting to take a chance on questionable food.
Step 43: Create an Emergency Snack Box
Keep a small box in your:
- Workplace
- Handbag
- Backpack
or another suitable place.
Choose shelf-stable foods and check expiry dates regularly.
If keeping food in a car, remember that temperature extremes can make many foods unsuitable for storage there.
Step 44: Prepare for Your First Restaurant Visit
You don’t need to avoid restaurants forever.
Before going:
Look at the Menu Online
See whether gluten-free options are available.
Call Ahead
You can say:
“I have coeliac disease and need to avoid gluten and cross-contact. Are you able to cater for me?”
Tell Your Server
Don’t simply order something marked GF without mentioning your coeliac disease.
Ask About Fryers
If you’re ordering chips, ask whether they’re cooked in a dedicated gluten-free fryer.
Ask About Sauces
Check sauces, marinades and dressings.
Ask About Preparation
Find out how the kitchen manages cross-contact.
Step 45: Don’t Be Embarrassed About Asking Questions
This can be difficult when you’re newly diagnosed.
You might feel as though you’re annoying the waiter.
You might worry that your friends think you’re being fussy.
But coeliac disease requires a medically necessary gluten-free diet.
You don’t need to give the restaurant your entire medical history.
Simply say:
“I have coeliac disease and need the meal to be strictly gluten free. Could you please check which options are suitable?”
Step 46: Download or Save Reliable Resources
For New Zealand readers, bookmark:
Their information covers diagnosis, gluten-free eating, the Crossed Grain Logo, membership and living with coeliac disease.
You can also use:
For food-labelling rules in New Zealand and Australia:
Food Standards Australia New Zealand (FSANZ)
These are much better places to verify important information than relying solely on random social-media posts.
Your Newly Diagnosed Kitchen Checklist
Here’s the practical list to work through:
☐ Create a gluten-free pantry area.
☐ Store gluten-free food above gluten-containing food where practical.
☐ Get a dedicated toaster or another appropriate method for preventing toaster cross-contact.
☐ Consider a dedicated chopping board.
☐ Check your colander.
☐ Check difficult-to-clean utensils.
☐ Separate butter and frequently double-dipped spreads.
☐ Check sauces.
☐ Check stock and gravy.
☐ Check seasonings.
☐ Keep wheat flour securely contained.
☐ Teach everyone in the household about crumbs.
☐ Keep preparation surfaces clean.
☐ Label gluten-free equipment.
☐ Create five easy gluten-free dinners.
☐ Keep emergency snacks available.
You don’t have to accomplish all of this in one afternoon.
Work through the list gradually.
Coming Up in Part 3
In Part 3, we’ll cover what happens after the initial adjustment period, including:
- Follow-up appointments after diagnosis
- Nutritional deficiencies and what your doctor may monitor
- When symptoms might improve
- What to do if you don’t feel better
- Accidental gluten exposure
- Medications and supplements
- Dental products and cosmetics
- Family members and coeliac testing
- Children and coeliac disease
- Travelling
- Building confidence
- Common newly diagnosed mistakes
- A 30-day newly diagnosed action plan
- Frequently asked questions
- Trusted resources
- Medical disclaimer
Coeliac Disease Newly Diagnosed Checklist: Part 3
Once you’ve sorted out your pantry, learned the basics of food labels and made your kitchen safer, you’ve already dealt with some of the hardest parts of being newly diagnosed with coeliac disease.
But what happens next?
Coeliac disease isn’t something you manage only by buying gluten-free bread. Your body may need time to recover, follow-up healthcare is important, and you’ll gradually need to learn how to handle situations such as travelling, medications, family gatherings and accidental gluten exposure.
This final section will help you move beyond those first overwhelming weeks and start building a gluten-free lifestyle that feels normal and manageable.
Step 47: Keep Your Follow-Up Appointments
After a coeliac disease diagnosis, don’t assume that starting a gluten-free diet means you never need to discuss coeliac disease with your healthcare team again.
Follow-up care can help assess:
- How your symptoms are improving
- Whether you’re managing the gluten-free diet successfully
- Your nutritional status
- Whether further blood tests are appropriate
- Whether additional medical follow-up is needed
Your doctor will determine which tests and follow-up schedule are appropriate for you.
Coeliac New Zealand – Living With Coeliac Disease
Step 48: Ask About Nutritional Deficiencies
Because coeliac disease can damage the small intestine, some people have nutritional deficiencies around the time they’re diagnosed.
Depending on your individual circumstances, your healthcare professional may investigate nutrients such as:
- Iron
- Folate
- Vitamin B12
- Vitamin D
- Calcium
Your needs will depend on your health, symptoms, diet and test results.
Don’t start taking large doses of supplements simply because you’ve read online that people with coeliac disease can be deficient.
Ask your doctor or dietitian what you actually need.
Step 49: Give Your Body Time to Recover
Starting a gluten-free diet doesn’t necessarily mean you’ll feel completely better within a few days.
Some symptoms may improve relatively quickly, while others can take considerably longer.
Healing of the small intestine also takes time.
This means you shouldn’t panic if you’ve been gluten free for a short period and don’t suddenly feel amazing.
Continue following your prescribed gluten-free diet and attend your recommended follow-up appointments.
Step 50: What if You Don’t Feel Better?
If you’ve been carefully following a gluten-free diet but your symptoms aren’t improving, talk to your healthcare provider.
Don’t automatically assume you need to remove another major food group.
There can be several reasons symptoms persist, including accidental gluten exposure or another health issue that needs investigation.
Your doctor or dietitian can help determine what needs to be checked.
Keeping a temporary food and symptom diary may also be useful if your healthcare professional recommends it.
Step 51: Learn What to Do After Accidental Gluten Exposure
At some point, you may accidentally eat gluten.
Perhaps a restaurant made a mistake.
Maybe you misread a label.
Perhaps someone used your gluten-free toaster for regular bread.
Unfortunately, there isn’t a proven home remedy that can “neutralise” gluten after you’ve eaten it.
Return to your normal strict gluten-free diet.
If you’re experiencing gastrointestinal symptoms, maintaining appropriate hydration may be helpful.
If your symptoms are severe, unusual, persistent or concerning, seek medical advice.
Most importantly, try to work out how the exposure happened so you can reduce the chance of the same mistake happening again.
Step 52: Don’t Rely on Symptoms to Detect Gluten
This is extremely important.
You might think:
“I ate that yesterday and felt fine, so it must be safe.”
That isn’t a reliable way to judge food.
People with coeliac disease can experience very different symptoms after gluten exposure, and some may have little or no obvious immediate reaction.
Use ingredient information and appropriate preparation practices—not symptoms—to decide whether food is suitable.
Step 53: Check Medicines
Food isn’t the only product you may start wondering about after diagnosis.
Medicines can contain numerous inactive ingredients.
If you’re unsure about a prescription or over-the-counter medicine, ask your:
- Pharmacist
- Doctor
- Medicine manufacturer
Your pharmacist is an especially useful first point of contact because they can check the formulation of a particular medication.
Don’t stop taking prescribed medication because you’re worried it might contain gluten without first speaking with an appropriate healthcare professional.
Step 54: Check Vitamins and Supplements
Supplements also need consideration because they’re swallowed.
This can include:
- Multivitamins
- Iron supplements
- Calcium supplements
- Vitamin D
- Probiotics
- Fibre supplements
- Protein powders
Check the product information and ask a pharmacist or manufacturer if you’re uncertain.
And remember: having coeliac disease doesn’t automatically mean you need every supplement marketed to people following a gluten-free diet.
Step 55: What About Toothpaste?
People newly diagnosed with coeliac disease often start worrying about everything in the bathroom.
Toothpaste isn’t food, but because small amounts can potentially be swallowed during normal use, you may want to check the manufacturer’s information if you’re uncertain about a particular product.
Don’t assume a product contains gluten based on rumours on social media.
Check reliable product information.
Step 56: What About Shampoo, Makeup and Skincare?
Coeliac disease is triggered by ingesting gluten rather than gluten simply touching intact skin.
This means ordinary external contact with gluten isn’t the same as eating it.
Products used around the mouth deserve more practical consideration because they may accidentally be swallowed.
For individual concerns—particularly if you also have a wheat allergy, skin condition or another medical issue—speak with your healthcare professional.
Step 57: Tell Your Dentist
It’s useful for your dentist and other healthcare providers to know about significant medical diagnoses.
Coeliac disease can sometimes be associated with oral and dental findings, and your dentist can consider your medical history as part of your overall care.
You don’t need to be frightened of going to the dentist because of gluten.
Simply include coeliac disease when you’re asked about your medical history.
Step 58: Talk to Your Doctor About Bone Health
Coeliac disease can affect nutrient absorption, including nutrients important for bone health.
Depending on factors such as your age, medical history, nutritional status and circumstances at diagnosis, your healthcare provider may consider whether further assessment is appropriate.
This doesn’t mean everyone with coeliac disease automatically has weak bones.
It means bone health is one of the areas that may be considered as part of ongoing care.
Step 59: Your Family May Need to Know About Testing
Coeliac disease can occur in families.
If you’ve been diagnosed, tell your doctor about your family history and ask whether close relatives should discuss coeliac testing with their own healthcare provider.
Coeliac New Zealand provides information about diagnosis and testing:
Coeliac New Zealand – Getting Diagnosed
Importantly, relatives shouldn’t simply start eating gluten free because you’ve been diagnosed.
If they need testing, removing gluten beforehand can interfere with the diagnostic process.
Step 60: Don’t Put Your Whole Family on a Gluten-Free Diet Without a Reason
You may decide that some family dinners are easier to make entirely gluten free.
That’s perfectly practical.
For example:
Roast chicken + vegetables + potatoes
can easily be a naturally gluten-free family dinner.
But family members without coeliac disease don’t automatically need a medically prescribed gluten-free diet simply because someone else in the household has coeliac disease.
The important thing is preventing gluten cross-contact with the food of the person who does have coeliac disease.
Step 61: Prepare for Travelling
Your first trip after diagnosis can feel intimidating.
Suddenly you’re leaving the kitchen you’ve carefully organised.
Planning makes a huge difference.
Before travelling:
- Research gluten-free restaurants.
- Locate supermarkets near your accommodation.
- Check whether your accommodation has cooking facilities.
- Research gluten-free labelling in your destination.
- Find the country’s national coeliac organisation.
- Pack suitable emergency snacks.
For international travel, check customs and biosecurity rules before packing food.
Step 62: Research the Country You’re Visiting
Gluten-free labelling rules aren’t identical worldwide.
That’s particularly important for New Zealanders travelling overseas.
Don’t assume that a product labelled a particular way overseas follows exactly the same standard you’re familiar with at home.
Look for information from:
- Government food authorities
- National coeliac organisations
- Reputable healthcare organisations
before travelling.
Step 63: Consider a Translation Card
If you’re travelling somewhere where you don’t speak the local language, a coeliac restaurant card can help communicate your needs.
A useful card should explain that you need to avoid gluten-containing ingredients and cross-contact.
Some national coeliac organisations provide travel information or translated cards.
Step 64: Keep Gluten-Free Snacks Available
This is useful even when you aren’t travelling.
Keep something suitable in your:
- Handbag
- Backpack
- Desk
- Travel bag
depending on storage requirements.
Why?
Because sometimes there simply won’t be anything you feel confident eating.
Having a backup snack means hunger doesn’t force you to gamble on questionable food.
Step 65: Learn to Say No
This can be one of the hardest parts of being newly diagnosed with coeliac disease.
Someone may lovingly bake something especially for you and say:
“It’s gluten free!”
But then you discover it was prepared with:
- Shared flour-covered equipment
- A crumb-covered chopping board
- Regular soy sauce
- A shared toaster
You don’t have to eat something simply because someone made an effort.
You can politely explain that coeliac disease requires you to be particularly careful about preparation.
Step 66: Help Friends and Family Understand
People may not understand coeliac disease immediately.
You might hear:
“Can’t you just have a little bit?”
or:
“You can pick the bread off.”
or:
“But there’s hardly any flour in it.”
Keep your explanation simple:
“I have coeliac disease, so I need to completely avoid gluten and food contaminated with gluten. Even small amounts matter.”
Most people don’t need a detailed medical explanation.
They just need to know how to keep your food safe.
Step 67: Don’t Make Food Your Entire Life
When you’re first diagnosed, gluten can consume your thoughts.
You read every label.
Google every ingredient.
Think about every crumb.
That’s understandable while you’re learning.
But the goal is to build routines that eventually make the process much more automatic.
You’ll find:
- Bread you like.
- Pasta you like.
- Safe sauces.
- Favourite snacks.
- Restaurants you trust.
- Easy family meals.
The mental workload gradually becomes smaller.
Step 68: Be Careful With Social Media Advice
Online coeliac communities can be incredibly useful for:
- Product recommendations
- Recipes
- Restaurant suggestions
- Practical tips
- Support
But they’re not substitutes for medical advice or official food-labelling information.
Be particularly cautious about claims such as:
“I eat this and I’m fine.”
Whether another person experiences symptoms doesn’t determine whether a food is suitable for your coeliac diet.
Common Mistakes When Newly Diagnosed With Coeliac Disease
Here are some of the biggest mistakes to watch for.
Mistake 1: Starting Gluten Free Before Testing Is Complete
If you’re still being investigated for coeliac disease, talk to your doctor before removing gluten.
Mistake 2: Only Avoiding Bread and Pasta
Gluten can also appear in sauces, seasonings, processed meat, stock, confectionery and many other products.
Mistake 3: Assuming Wheat-Free Means Gluten Free
Barley and rye also contain gluten.
Mistake 4: Forgetting About Cross-Contact
Gluten-free food can be exposed to gluten through crumbs, utensils and cooking equipment.
Mistake 5: Trusting a Product Forever
Recipes and manufacturing processes can change.
Keep checking labels.
Mistake 6: Relying on Symptoms
Not feeling sick doesn’t prove a food was safe.
Mistake 7: Following Overseas Advice Without Checking NZ Rules
Food standards differ between countries.
This is particularly relevant to discussions about oats.
New Zealand readers should follow New Zealand and Australian guidance.
Food Standards Australia New Zealand
Your First 30 Days After a Coeliac Diagnosis
If everything in this article feels overwhelming, here’s a simpler plan.
Week 1: Learn
Concentrate on:
☐ Wheat, barley and rye
☐ Naturally gluten-free foods
☐ Basic label reading
☐ Finding five easy meals
☐ Getting reliable information
Week 2: Fix Your Kitchen
Work through:
☐ Toaster
☐ Chopping board
☐ Colander
☐ Butter and spreads
☐ Pantry storage
☐ Flour
☐ Sauces
☐ Stock
☐ Seasonings
☐ Household rules
Week 3: Build Your Routine
Find:
☐ Your favourite gluten-free bread
☐ Gluten-free pasta
☐ Breakfast options
☐ Lunch options
☐ Snacks
☐ Easy dinners
☐ A restaurant you feel comfortable with
Week 4: Think Longer Term
Consider:
☐ Follow-up medical care
☐ Dietitian support
☐ Nutritional questions
☐ Family testing discussions
☐ Work arrangements
☐ Eating out
☐ Travel
☐ Emergency snacks
After a month, you won’t know everything.
You don’t need to.
But you’ll probably know considerably more than you did on the day you were diagnosed.
Frequently Asked Questions
What Should I Do First After Being Diagnosed With Coeliac Disease?
Once your diagnosis is medically confirmed and your healthcare team advises you to begin treatment, start learning how to follow a strict gluten-free diet.
Focus first on recognising gluten-containing grains, understanding naturally gluten-free foods, reading labels and reducing cross-contact.
Do I Need to Throw Away Everything in My Kitchen?
No.
Many kitchen items can continue to be used after thorough cleaning.
Items that are difficult to clean or trap crumbs may be easier to keep separate.
Does My Whole Family Need to Eat Gluten Free?
Not necessarily.
Many families successfully maintain both gluten-free and gluten-containing foods in the same home by using careful storage, preparation and cleaning practices.
How Long Does It Take to Feel Better After Going Gluten Free?
It varies considerably.
Some symptoms may improve relatively quickly, while others can take longer.
Intestinal healing can also take time.
Talk to your healthcare provider if symptoms persist or you’re concerned.
Can I Have a Little Bit of Gluten Occasionally?
A strict gluten-free diet is the treatment for coeliac disease.
A “cheat day” approach isn’t considered appropriate treatment for coeliac disease.
What if I Accidentally Eat Gluten?
Return to your normal strict gluten-free diet and consider how the exposure happened.
Seek medical advice if symptoms are severe, persistent or concerning.
Can I Still Eat at Restaurants?
Yes.
You’ll need to ask about ingredients and gluten cross-contact.
Our complete Eating Out With Coeliac Disease: Gluten-Free Restaurant Guide covers this in much more detail.
Add an internal link to your eating-out article here.
Can I Travel With Coeliac Disease?
Yes.
Research your destination, take suitable backup food where permitted and learn about local food labelling and restaurant practices before travelling.
Newly Diagnosed Coeliac Disease: Complete Checklist
Save this list for later:
☐ Complete appropriate testing before removing gluten.
☐ Learn about coeliac disease.
☐ Learn wheat, barley and rye.
☐ Follow NZ guidance about oats if you live in New Zealand.
☐ Learn naturally gluten-free foods.
☐ Read food labels.
☐ Check sauces and seasonings.
☐ Check processed meats.
☐ Organise your pantry.
☐ Prevent cross-contact.
☐ Sort out your toaster.
☐ Check chopping boards and difficult-to-clean equipment.
☐ Separate crumb-contaminated spreads.
☐ Find five easy meals.
☐ Keep emergency snacks.
☐ Learn how to order at restaurants.
☐ Attend recommended medical follow-ups.
☐ Consider seeing a coeliac-experienced dietitian.
☐ Ask about nutritional deficiencies if appropriate.
☐ Discuss family testing with your doctor.
☐ Use trustworthy coeliac resources.
☐ Give yourself time to adjust.
Final Thoughts
Being newly diagnosed with coeliac disease can make something you’ve done your entire life—eating—suddenly feel complicated.
You start noticing gluten everywhere.
Bread crumbs suddenly matter.
Supermarket trips take longer.
Restaurant menus require questions.
Even your toaster becomes something you have to think about.
But those first weeks aren’t what the rest of your life with coeliac disease will necessarily feel like.
You learn.
You find products you like.
You organise your kitchen.
You learn which labels to check.
You discover restaurants that understand your needs.
And eventually, many of the things that initially required conscious effort simply become part of your normal routine.
You don’t need to master coeliac disease on the day you’re diagnosed.
Start with the basics.
Make your home safer.
Learn how to read labels.
Ask questions.
Use trustworthy information.
And get appropriate medical and dietary support when you need it.
One step at a time, living gluten free becomes much more familiar.
Related Guides
Foods You Can Eat With Coeliac Disease: Complete Gluten-Free Food List
Foods to Avoid With Coeliac Disease: Complete Gluten-Free Guide
Common Hidden Sources of Gluten: Foods, Drinks & Everyday Products to Watch Out For
How to Read Gluten-Free Food Labels: A Beginner’s Guide
How to Avoid Gluten Cross-Contamination With Coeliac Disease
The Ultimate Gluten-Free Shopping Guide
Eating Out With Coeliac Disease: How to Stay Gluten Free at Restaurants
How to Get Diagnosed With Coeliac Disease: Symptoms, Testing & Where to Get Help Worldwide
Trusted Sources
To help ensure the information in this guide is accurate and up to date, the following organisations provide evidence-based information about coeliac disease:
Mayo Clinic – https://www.mayoclinic.org
Health New Zealand | Te Whatu Ora – https://www.tewhatuora.govt.nz
Coeliac New Zealand – https://coeliac.org.nz
Coeliac Australia – https://www.coeliac.org.au
Coeliac UK – https://www.coeliac.org.uk
Celiac Disease Foundation – https://celiac.org
Beyond Celiac – https://www.beyondceliac.org
Canadian Celiac Association – https://www.celiac.ca
National Institute of Diabetes and Digestive and Kidney Diseases (NIDDK) – https://www.niddk.nih.gov
Medical Disclaimer
This article is provided for general educational purposes only and isn’t intended to diagnose, treat or replace personalised medical or dietary advice.
If you think you may have coeliac disease, are undergoing testing, have recently been diagnosed, or have concerns about your symptoms or diet, speak with your doctor or an appropriately qualified dietitian.
Do not start a gluten-free diet before completing coeliac disease testing unless your healthcare professional has advised you to do so.
Leave a Reply
You must be logged in to post a comment.